
Step-by-step guide to uploading existing data to your project
Once your project is up and live, you may want to add existing data to it. Here you’ll find instructions to make that happen.
BEFORE YOU GET STARTED:
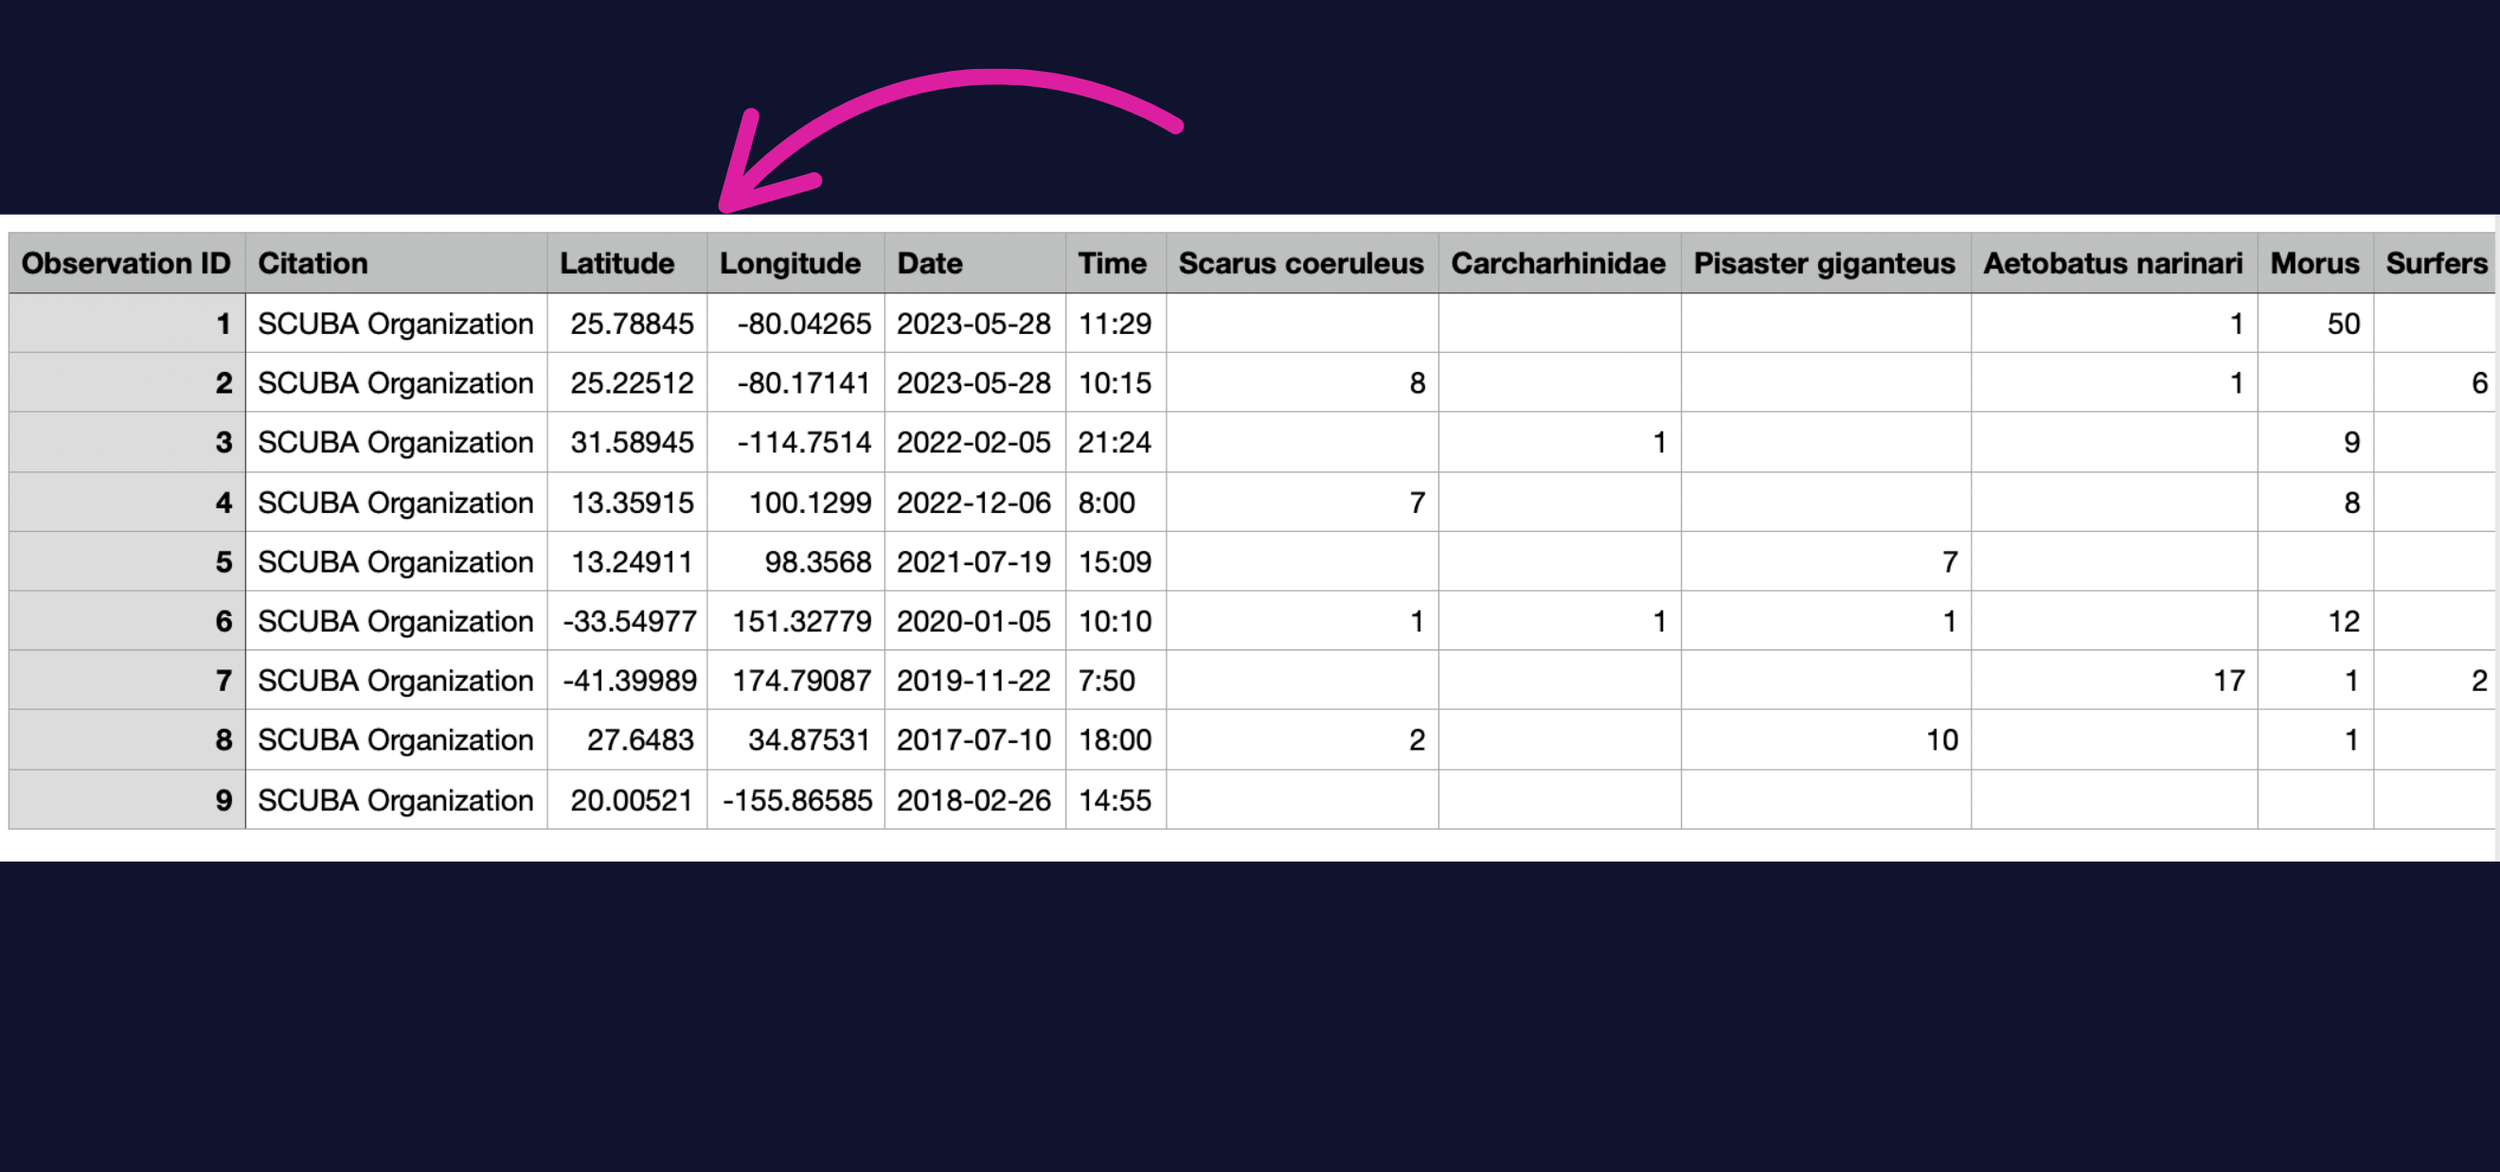
Please ensure you format your data to match the example below before uploading to your project. Here’s a downloadable template.
NOTE: Only only sampling methodology can be uploaded at a time. Each sampling methodology needs to be in a new spreadsheet so that it can be mapped to that methodology. Ensure every method you’re using is already in the eOceans list. If your method is missing, contact us to add it.

SIGN UP or LOG IN to access your dashboard.
You can create or access your account via the eOceans mobile app (Android, iOS) or dashboard.
Visit the dashboard by clicking sign up or log in in the top right corner to create or manage your account.

Select TEAMS
Once in your dashboard, navigate to the Teams tab from the menu.

Select the team you want to add it to
Select OWNED TEAMS and then select the team you are adding data to from the list.
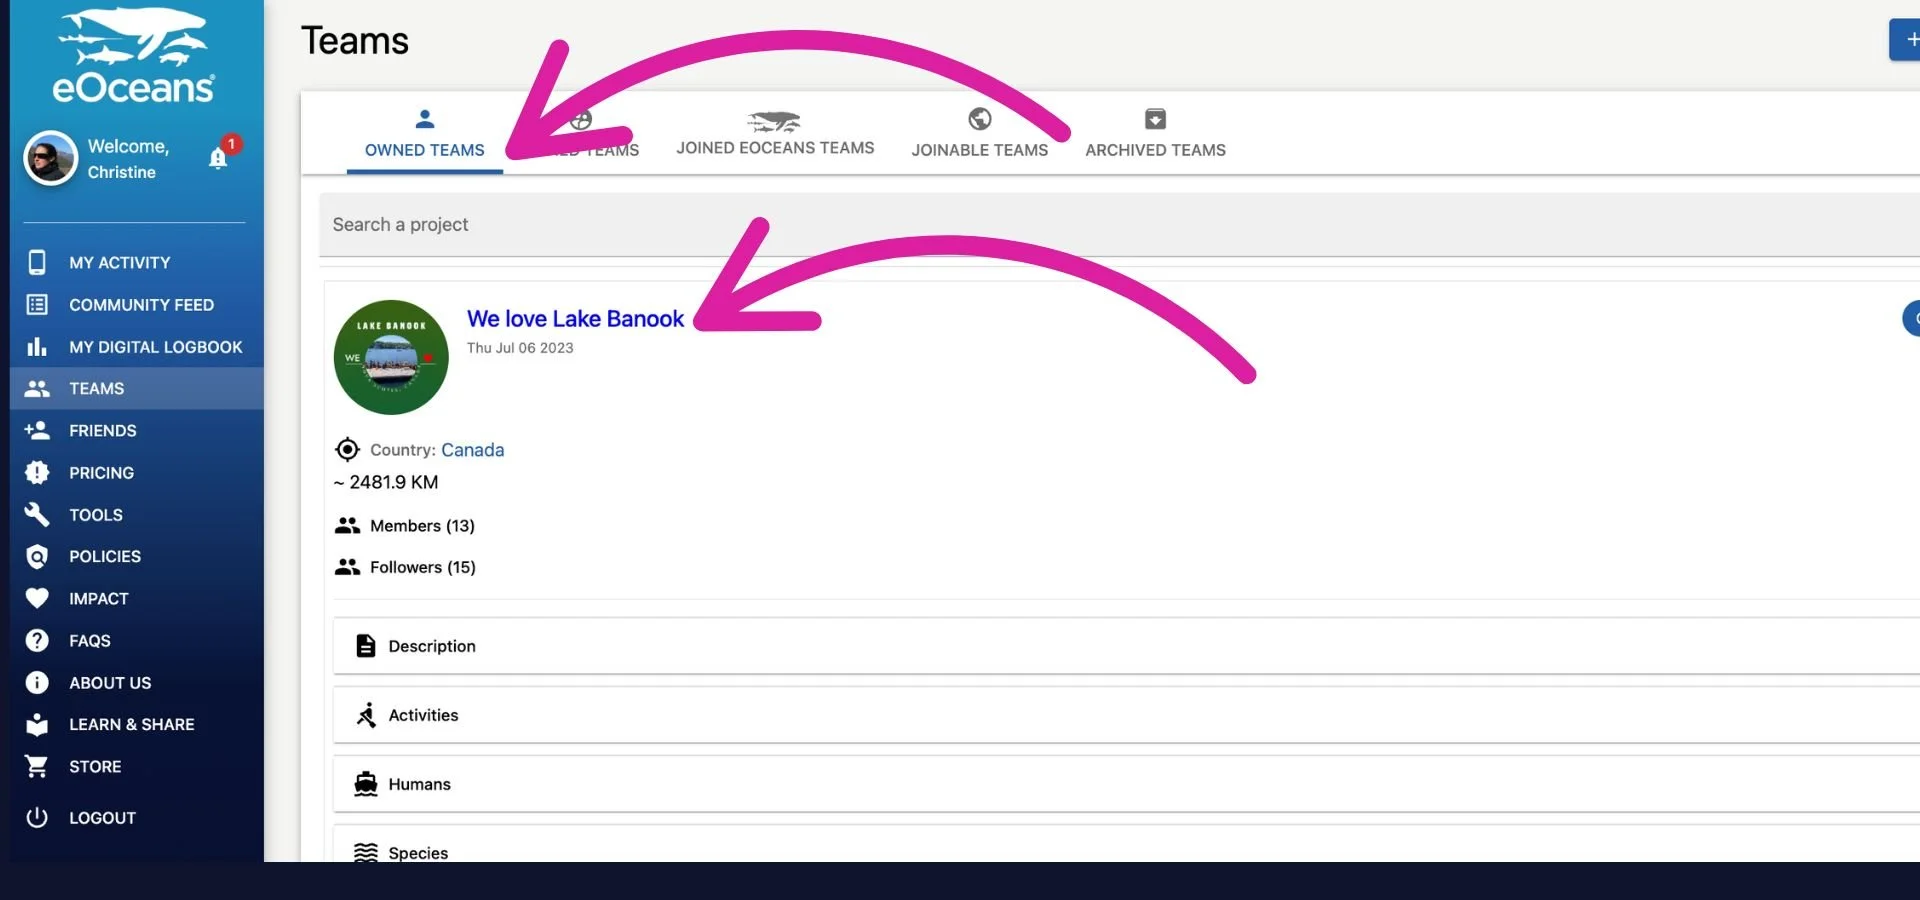
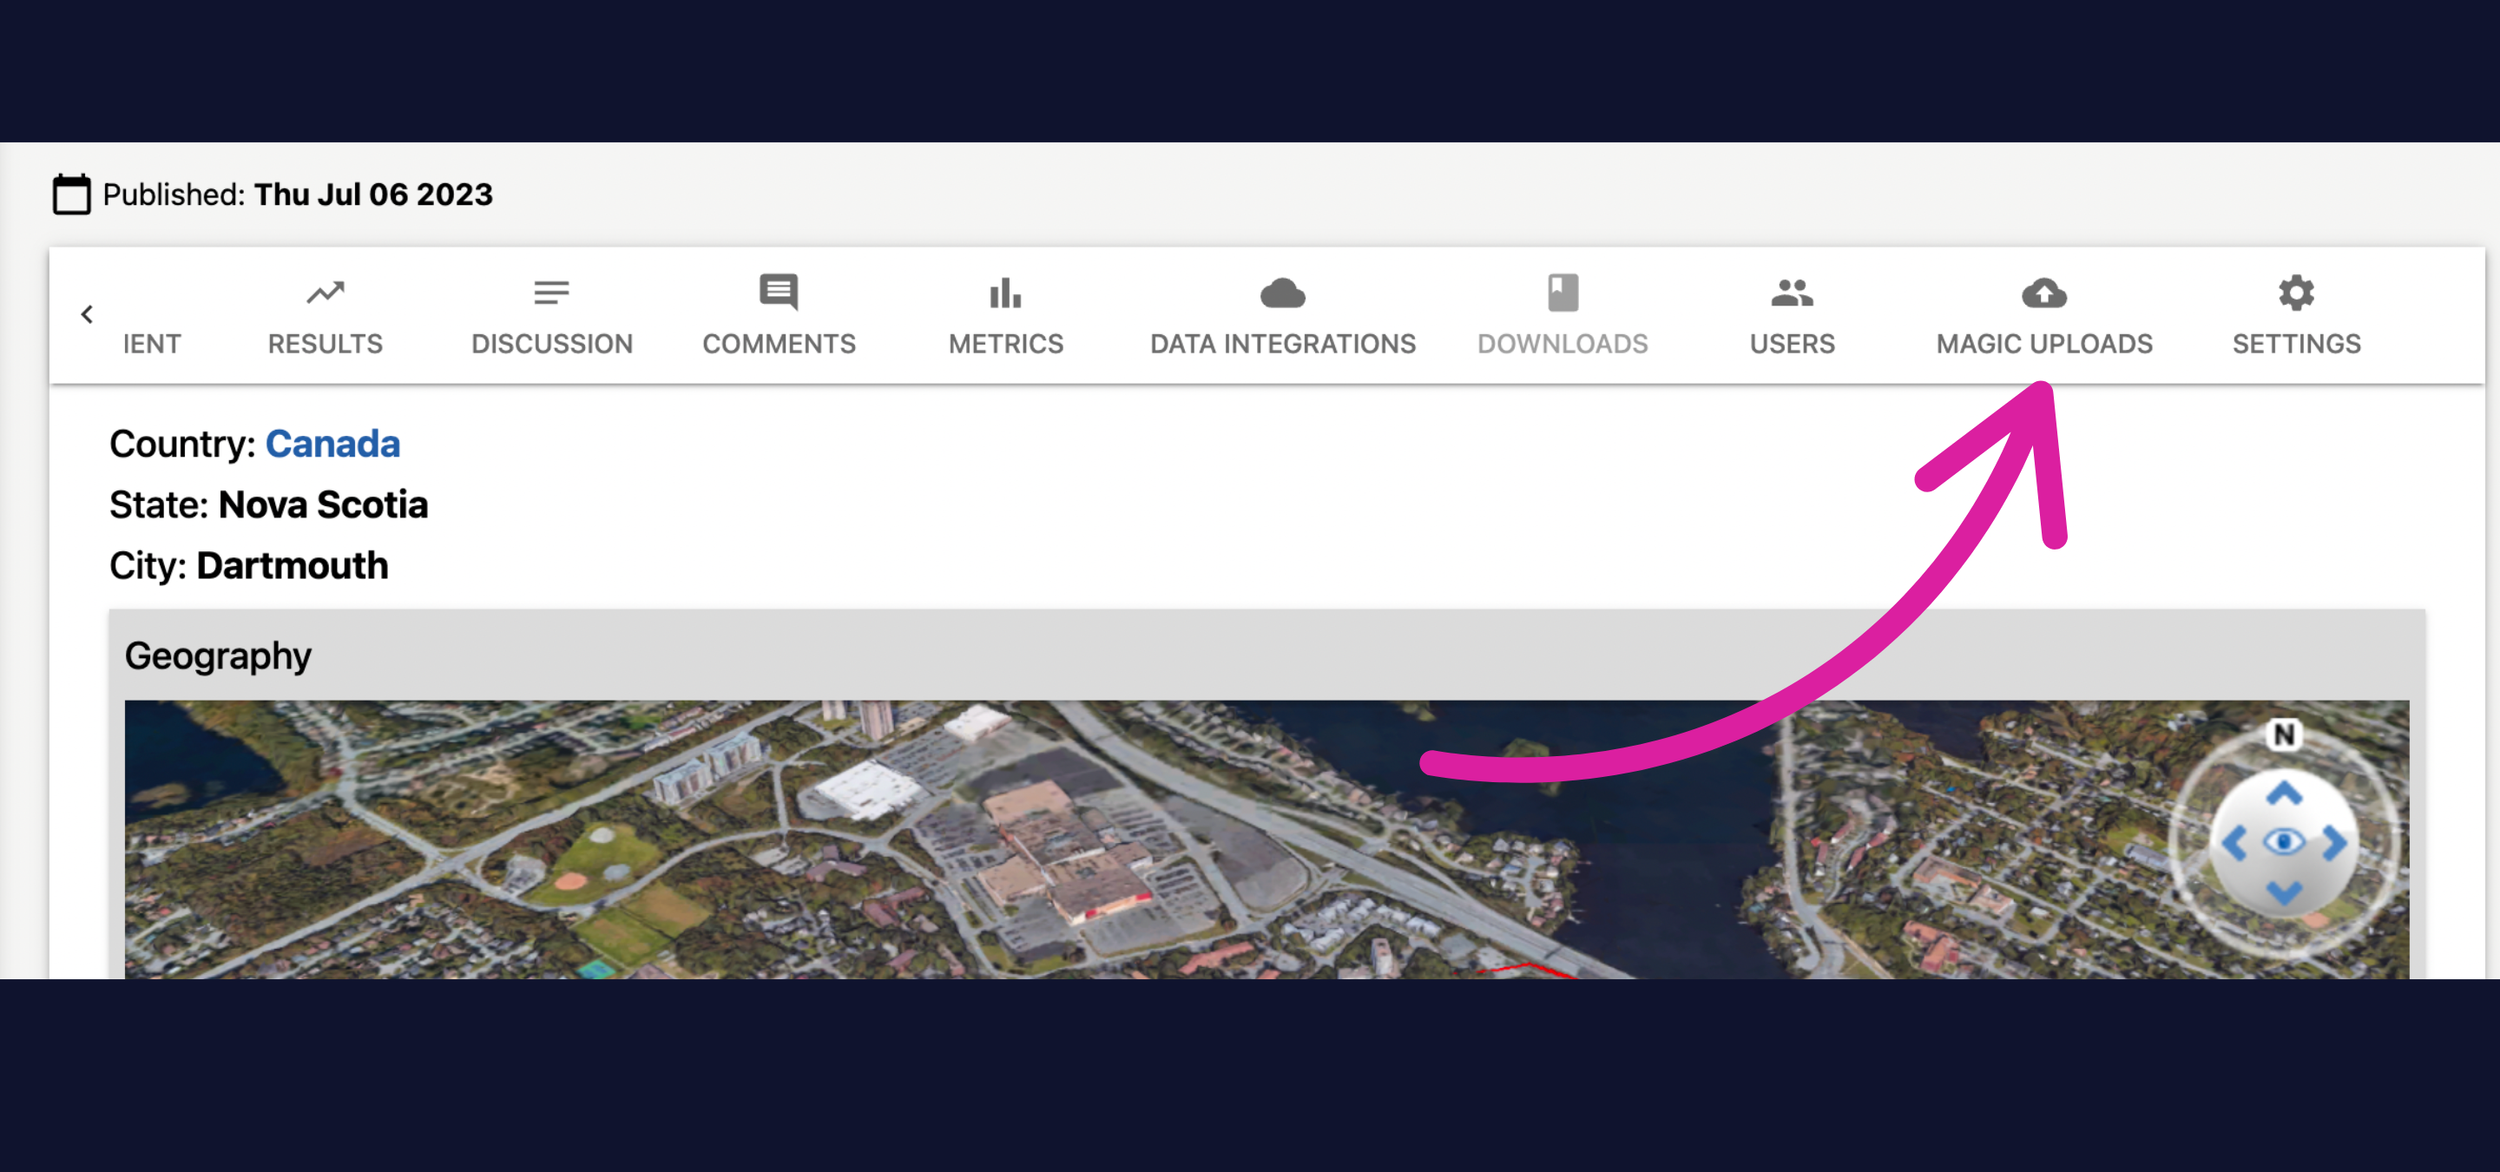
Select MAGIC UPLOADS
Every team has a series of tabs that scroll horizontally, scroll across your teams tab and select MAGIC UPLOADS.
FORMAT -> How much data -> Purchase.
To upload data you’ll need to format it and tell eOceans how much data you want to upload. Download the Example Dataset to see how to organise your data. If you need assistance with data formatting, please reach out to our consulting services.
Once your data is formatted, select your dataset size and purchase the access to use Magic Uploads.

Formatting your data for upload
Your data may come in many formats, with many variables. eOceans needs to know which columns contain the variables of interest. Variables indicated by a * below, are required.
*Citation — this is important if you are uploading more than one dataset, so you know which dataset is being called.
Latitude and Longitude — Location coordinates. We suggest you place your sites on a mapping tool, like Google Maps, to ensure they are in the right coordinate system before uploading. If not, they need to be fixed.
Date — YYYY/MM/DD format.
Time — Local, 24-hour time.
Variables get listed with either presence/absence or abundance (number).
IMPORTANT: The variable names need to EXACTLY match those in eOceans databases so that they can be matched properly.
i) Species: For species names, consult WoRMS — the names need to be ‘accepted’ and cannot be deprecated.
ii) Humans: Consult our humans list in the mobile app or dashboard. If your human dimension is missing, let us know.
Consulting Services
Need help with data formatting, wrangling, etc? Reach out to our Consulting Services.
Having trouble? Our team is here to help.
Contact us or visit our how-to page for more information on using eOceans.