Step-by-step guide to editing your project

Once you're project is up and running, you may want to edit it. You can edit any part that is NOT linked to the data stream (e.g., study area, data sources, and variables).

SIGN UP or LOG IN to access your dashboard.

Access your account via the eOceans dashboard.
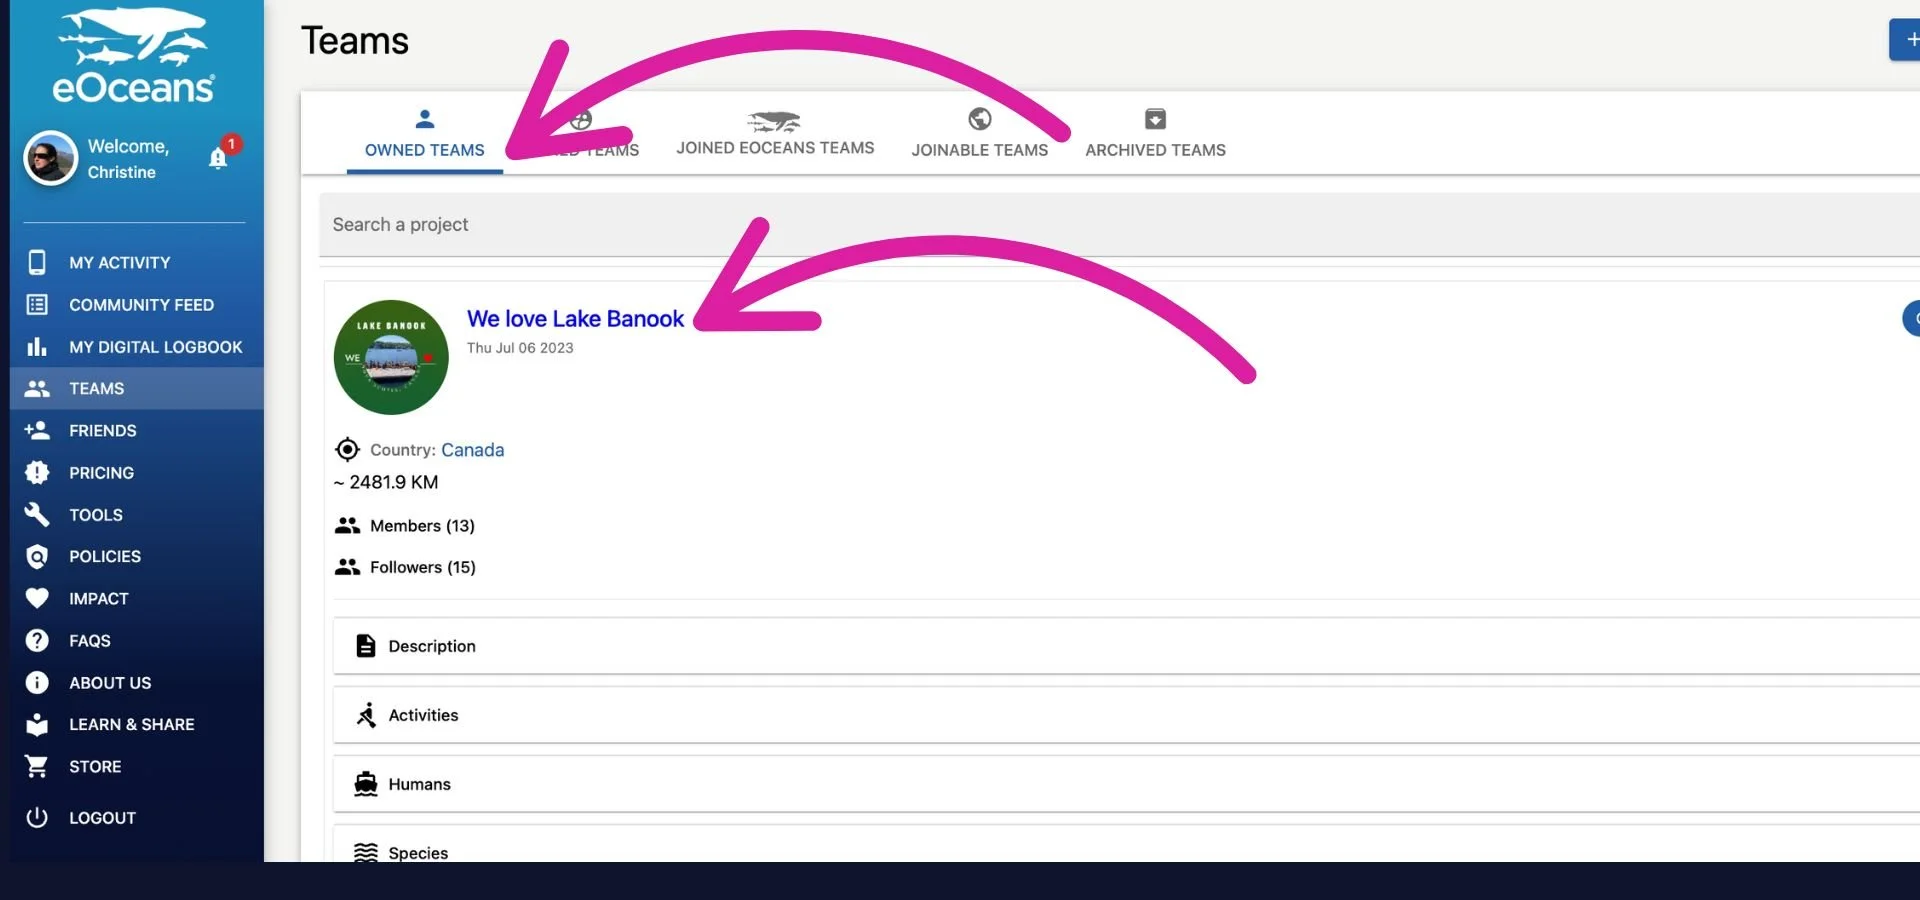
Sign-up and log-in buttons on a dark background with a pink arrow pointing from the sign-up button.

Select TEAMS

Once in your dashboard, navigate to the Teams tab from the menu.

Screenshot of the Ocean Ledger dashboard showing observations and global map from the eOceans platform, with a user named Christine logged in, and a pink arrow pointing to the 'Teams' menu on the left sidebar.

Select OWNED TEAMS

Open the team you want to edit.

Screenshot of a web page from eOceans platform showing a project titled "We love Lake Banook" with details about the project, including country Canada, distance 2481.9 km, and member and follower counts.

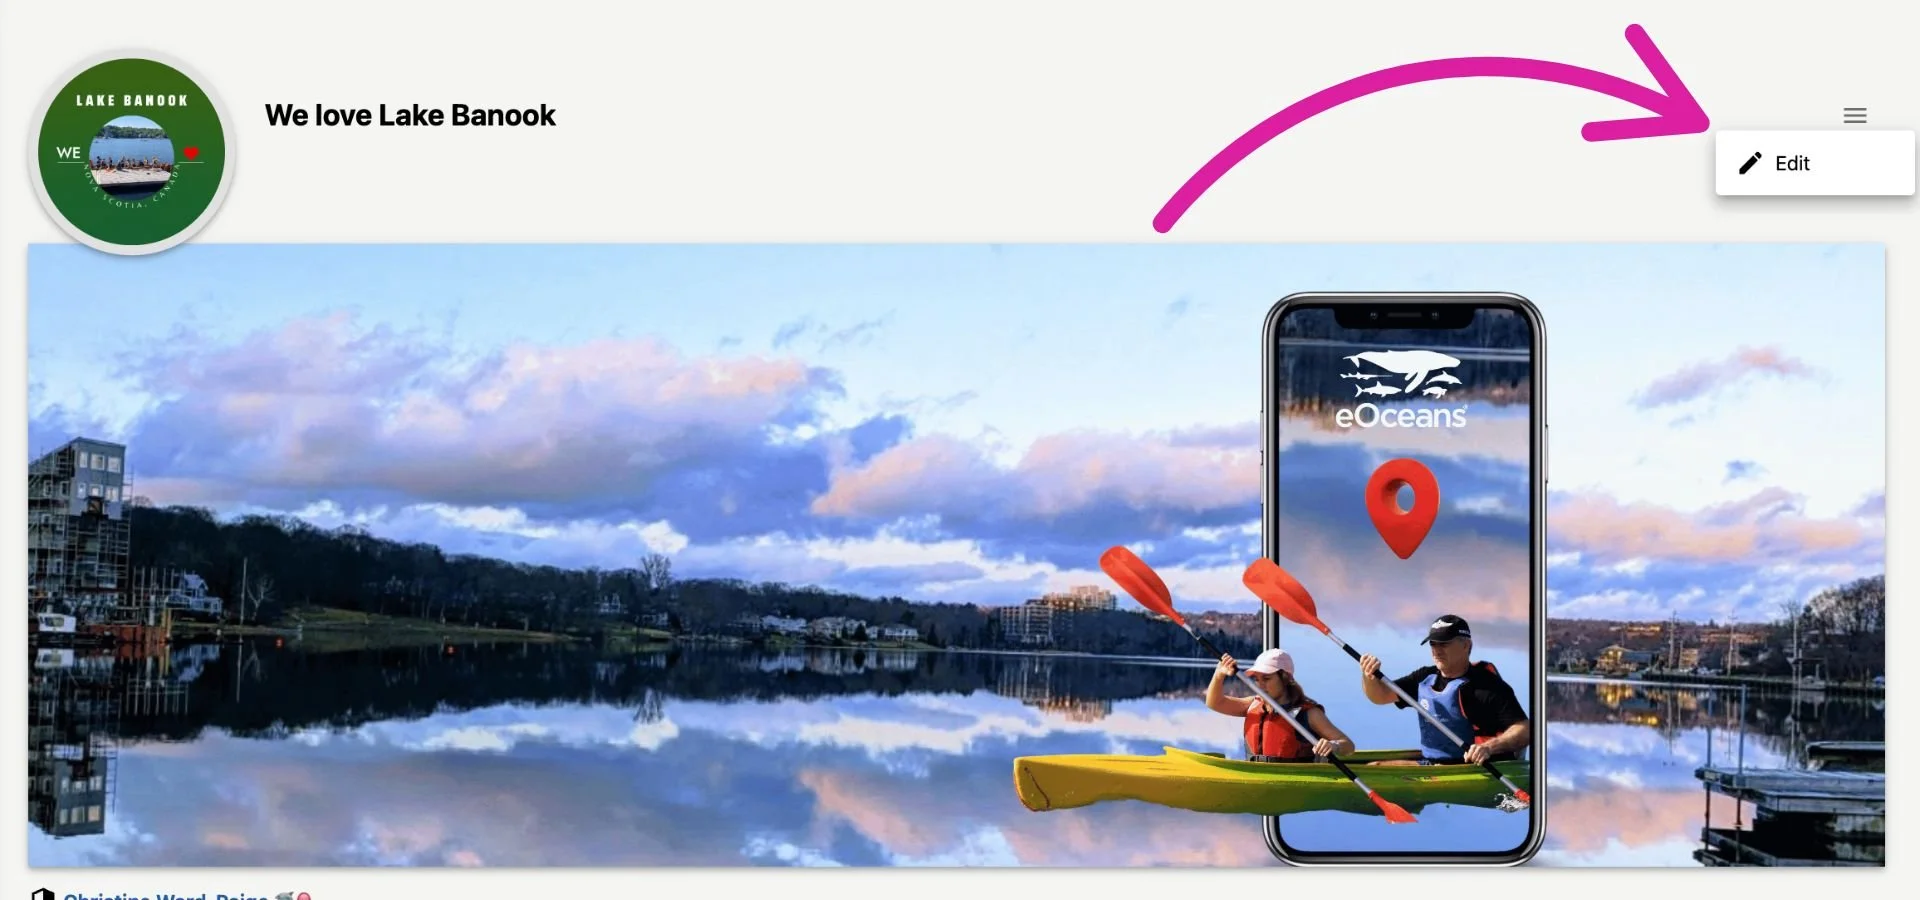
Select EDIT from the menu

In the top right corner, select the burger menu (three lines) then, EDIT.

A digital illustration of two people kayaking on a lake, with a smartphone overlay showing a map and a location marker, and a background of a calm lake with a reflection of the sky and clouds, surrounded by buildings and trees.

Edit what you need to

*Editable items may include:

  • Project name

  • Project logo

  • Project banner image

  • Project description

  • Project goals

  • Project objectives

  • Project methods

  • Project sites

  • Management plan

  • Discussion

  • URL’s

  • Ethics & Acknowledgements

Screenshot of a webpage for a project titled "We love Lake Banook" by eOceans Research, showing a logo with a lake and a boat, and a photo of kayakers on a lake with a city skyline in the background.

SAVE changes

After you’ve made the required edits, SAVE PROJECT to save the changes you’ve made.

Webpage with social media URLs and a 'Save Project' button, featuring pink arrow pointing to the button.

Having trouble? Our team is here to help.

Contact us or visit our how-to page for more information on using eOceans.

Contact us
How-to
Dashboard Login